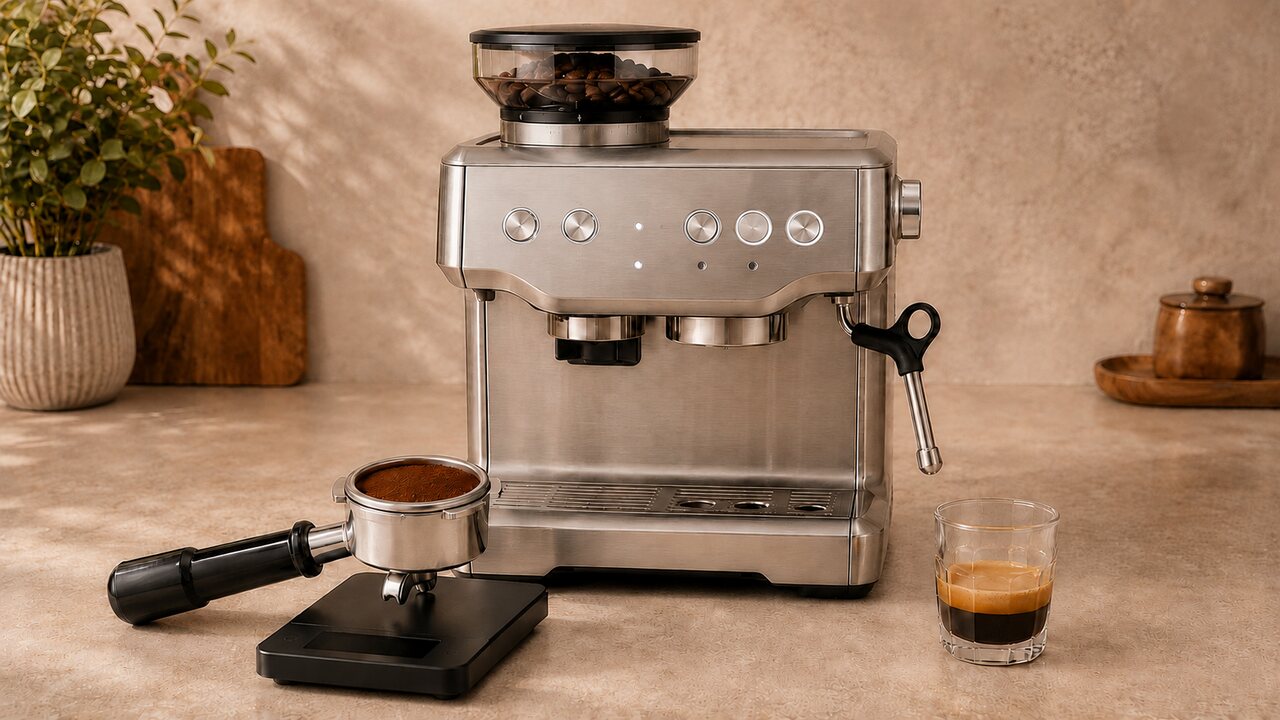
The best Breville Barista Express settings are a repeatable starting point, not one universal grind number. For a functioning BES870 or BES870XL, the current U.S. manual starts at grind size 5 and places the GRIND AMOUNT dial at about 3 o’clock. With fresh whole beans, use the Single Wall basket that matches the FILTER SIZE setting, keep the dose consistent, tamp level and adjust one variable at a time. A fast, pale shot normally needs a finer grind; a slow, dark drip normally needs a coarser grind.
This guide covers normal setup and dial-in on the Barista Express BES870 series, including the BES870XL sold in North America. It does not cover first-use assembly, the Barista Express Impress BES876 or a machine that is failing to grind, pump or heat. Button labels and accessories can vary by revision, so compare any sequence below with the official U.S. BES870 instruction manual supplied for your machine.
If you are still deciding which machine to buy rather than dialing in a BES870XL you already own, see our Ninja Luxe Café Premier vs Breville Barista Express comparison for the differences in workflow, grinder guidance, milk frothing, drink options, and value.
Start simple: Use the default temperature, one basket, one coffee and a consistent dose. Correct shot speed with the external grind-size selector before changing temperature, programmed volume or the adjustable upper burr.
Breville Barista Express starting settings
The following settings reproduce the current manual’s baseline for the BES870. They are designed to get you close enough to evaluate the shot; the beans and result decide the final position.
| Control or measurement | Useful starting point | What to adjust after the test shot |
|---|---|---|
| Filter basket | 2 CUP Single Wall for fresh whole beans | Use Dual Wall for pre-ground coffee; do not compare settings across basket types |
| FILTER SIZE button | DOUBLE with the 2 CUP basket | Match SINGLE or DOUBLE to the installed basket |
| External GRIND SIZE | 5 | Lower number for finer; higher number for coarser |
| GRIND AMOUNT | About 3 o’clock | Move toward MORE or LESS to reach a consistent basket dose |
| 2 CUP dose | 16–19 g | Hold one chosen dose steady while adjusting grind size |
| 1 CUP dose | 8–11 g | Dial it in separately from the 2 CUP basket |
| Tamp | Level, with 22–33 lb (10–15 kg) in the manual | Prioritize repeatability and an even puck |
| Shot time | About 25–30 seconds in the manual’s extraction guide | Use time, flow and taste together |
| Water temperature | Factory default | Change only after grind, dose and flow are stable |
A coffee scale makes these settings more repeatable because the GRIND AMOUNT dial controls a timed dose, not a guaranteed weight. If you use a common 1:2 starting ratio, an 18 g dry dose would produce about 36 g of espresso. Treat that as a measurement for the first comparison, not a Breville factory specification or a rule that every roast must follow.
What each Barista Express control actually changes
Several controls affect the same shot, but they do different jobs. Knowing which one you changed prevents an improvement from being accidental and impossible to repeat.
| Control | What it changes | What it does not guarantee |
|---|---|---|
| GRIND SIZE selector | How fine or coarse the coffee particles are | A fixed shot time for every bean |
| GRIND AMOUNT dial | How much coffee the timed grinder dispenses | An exact gram dose |
| FILTER SIZE button | Which automatic grind duration the machine uses | That the physical basket is the matching size |
| 1 CUP and 2 CUP buttons | Preset or programmed water volume | A fixed beverage weight through every puck |
| PROGRAM button | Stores shot volume and enters temperature mode | Better extraction without a correct puck |
| Pressure gauge | Resistance during brewing, including pre-infusion and extraction | A complete judgment of taste |
Grind size is normally the main dial-in control once the dose is consistent. The GRIND AMOUNT dial helps you repeat that dose. Shot volume determines when an automatic extraction stops, while temperature is a later taste adjustment. Changing all four after one poor shot makes the result harder to diagnose.
Choose the basket before changing the grinder
The basket changes how sensitive the shot is to grind, dose and tamp. Select it first and keep it constant throughout a dial-in session.
- Single Wall basket: Use it with freshly ground whole beans. Its open base lets grind size, dose and puck preparation control the resistance, so it is the appropriate basket for dialing in espresso.
- Dual Wall basket: Use it for pre-ground coffee. Its pressurized design regulates resistance and is more forgiving of grind and freshness, but it cannot be dialed in in the same way as a Single Wall basket.
- 1 CUP versus 2 CUP: Install the basket for the drink you intend to make, then set FILTER SIZE to SINGLE or DOUBLE to match. Switching basket sizes changes the appropriate grind amount and may require a fresh dial-in.
The 2 CUP Single Wall basket is usually the easier place to learn because its 16–19 g design range gives you a larger puck and a more measurable output. Once it is working, dial in the 1 CUP basket separately rather than assuming that half the grinder time will behave identically.
How to dial in the Barista Express step by step
Use the same preparation for every comparison. The goal of the first shots is not perfection; it is to make the next adjustment obvious.
- Warm the brewing parts. Wait until the POWER light stops flashing. Heat the cup and portafilter, then dry the basket before grinding. Run a short group-head purge just before locking in the prepared portafilter.
- Load one fresh coffee. Do not change bean, roast or basket during the session. Breville recommends beans with a roasted-on date and grinding immediately before extraction.
- Set the baseline. For the 2 CUP Single Wall basket, select DOUBLE, place GRIND SIZE at 5 and put GRIND AMOUNT near 3 o’clock.
- Measure the dry dose. Tare the dry portafilter on a scale, grind and record the coffee weight. Choose a repeatable value within the basket’s 16–19 g design range; 18 g is a convenient midpoint when the basket accepts it without overfilling.
- Prepare a level puck. Distribute the grounds evenly, tamp straight down with consistent pressure and use the supplied Razor tool if needed to trim the tamped dose. Brush loose grounds from the basket rim.
- Measure the extraction. Put the cup and scale beneath the portafilter, start the shot and timer together, and note total time, beverage weight, first-flow behavior, gauge position and taste.
- Choose one correction. If the shot is fast and pale, go one step finer. If it drips slowly and tastes harsh, go one step coarser. Keep the dry dose and puck preparation the same for the next test.
- Repeat and record. Two or three controlled changes teach you more than moving several controls at once. Stop when the flow is reasonable and the espresso tastes balanced to you, even if another person’s grind number is different.
If water is weak from the empty group head, dial-in settings are no longer the right branch. Use the Barista Express water-flow troubleshooting guide before making the puck finer or increasing the dose.
How to adjust Breville Barista Express grind size
On the BES870 selector, a smaller number is finer and a larger number is coarser. Finer particles create more resistance and slow the shot; coarser particles create less resistance and speed it up.
| Shot behavior | First grind change | What to hold constant |
|---|---|---|
| Fast, pale or watery | One number finer | Dose, basket, tamp and shot stop point |
| Starts almost immediately | One number finer | Confirm the dose is not low |
| Slow drips or no continuous stream | One number coarser | Confirm the dose is not excessive |
| Very dark, harsh or dry | One number coarser if the shot is also slow | Do not change temperature yet |
| Time is close but taste is slightly off | Make a single small change or adjust the stop point | Keep the dry dose repeatable |
After a grind-size change, a small amount of coffee retained in the grinder can still reflect the previous position. Avoid drawing a conclusion from a mixed dose. Make one small adjustment, grind enough for the next complete dose and record the new setting.
When to change the adjustable upper burr
The adjustable upper burr extends the external selector’s usable range. It is not the first control to change. Consider it only when a correctly dosed shot remains too fast at the fine end of the external dial, or too slow at the coarse end, across controlled tests.
- Empty the hopper and run the grinder empty as shown in the manual before removing the hopper.
- Switch the machine off and unplug it before handling removable grinder parts. Burr edges are sharp.
- Move the upper-burr setting by only one number, reinstall and lock every part, then begin the external dial-in again.
- Do not copy an inner-burr number from a different Barista Express revision. Preserve the original position in your notes so you can reverse the change.
If the grinder gives no grounds, makes a new loud noise, flashes both FILTER SIZE lights or produces an erratic dose despite correct settings, stop changing the burr range and use the Barista Express grinder troubleshooting guide.
Set the dose with GRIND AMOUNT and FILTER SIZE
GRIND AMOUNT changes how long the built-in grinder runs during automatic dosing. Turning it toward MORE increases the dispensed amount; turning it toward LESS decreases it. FILTER SIZE tells that automatic cycle whether you are filling a 1 CUP or 2 CUP basket.
The dial markings do not equal grams. Bean density, grind size, hopper load and retention can all change the delivered weight. Use the current manual’s basket ranges as the physical reference:
- 1 CUP basket: approximately 8–11 g.
- 2 CUP basket: approximately 16–19 g.
Breville’s visual dose check is also useful: after tamping, the top of the supplied tamper’s metal cap should sit level with the basket rim. The Razor dose-trimming tool then removes coffee above the intended puck height. This helps prevent an overfilled basket from pressing into the shower screen or leaking around the rim.
Once you have selected a dry dose, keep it stable while correcting shot speed with grind size. Increase or decrease dose only when it is clearly outside the basket’s range, the Razor removes a large excess, or the grinder is consistently underfilling the basket. Dose should not become a substitute for every grind adjustment.
Use tamping for consistency, not as a speed dial
The current BES870 manual specifies 22–33 lb (10–15 kg) of tamping pressure. In practice, level and repeatable puck preparation matters more than trying to rescue each shot with a different force.
- Distribute the coffee so one side of the basket is not visibly higher.
- Place the portafilter on a stable surface and keep the tamper level.
- Press once with consistent force rather than tamping repeatedly at different angles.
- Check puck height, trim with the Razor if needed and clean the rim before locking in.
If one shot runs fast and the next chokes with the same grind setting, first check dose weight, distribution and basket cleanliness. Randomly alternating between a very light and very heavy tamp hides the real source of inconsistency.
Read time, flow, pressure and taste together
Breville’s extraction guide describes a balanced shot at about 25–30 seconds. It identifies a fast extraction of up to 20 seconds as under-extracted and a slow extraction over 35 seconds as over-extracted. Those are useful diagnostic bands, not a reason to discard a good-tasting shot at 24 or 31 seconds.
| Combined evidence | Likely direction | First controlled change |
|---|---|---|
| Under 20 seconds, fast like water, pale and weak | Too little resistance | Grind one step finer; verify the dose is not low |
| About 25–30 seconds, steady flow and balanced taste | Useful dial-in zone | Keep the recipe and record it |
| Over 35 seconds, drips, very dark and bitter | Too much resistance | Grind one step coarser; verify the dose is not high |
| Gauge low but empty-group flow is normal | Puck may provide too little resistance | Check grind, dose and basket |
| Gauge high and espresso barely flows | Puck or basket may be too restrictive | Go coarser, reduce excess dose and check basket holes |
| Time looks normal but flavor is unbalanced | The stop point, temperature or coffee may need refinement | Change one later-stage variable only |
The manual uses different first-flow ranges in two sections—approximately 4–7 seconds in its operating instructions and 8–12 seconds in its illustrated extraction guide. For that reason, do not diagnose a shot from the first drip alone. Total time, flow pattern, dose and taste provide a stronger decision.
Do not chase one exact needle position while ignoring the cup. The gauge measures resistance, not flavor, and a pressurized Dual Wall basket behaves differently from a Single Wall basket. If the gauge remains low, high or motionless after the basic settings are controlled, continue with the Breville Barista Express pressure guide.
Program the 1 CUP and 2 CUP shot volume
The factory buttons are volumetric. In the current U.S. manual, 1 CUP is approximately 1 fl oz (30 ml) and 2 CUP is approximately 2 fl oz (60 ml). The beverage in the cup can still vary with grind and dose because the puck retains water and changes the flow.
Dial in grind and dose before saving a new volume. Otherwise, the programmed stop point masks a fast or choked puck instead of correcting it.
How to save a new shot volume
- Prepare the same basket, dose and grind setting you have already dialed in.
- Press PROGRAM once. The machine beeps once and the PROGRAM light flashes.
- Press 1 CUP or 2 CUP to start the extraction.
- Press the same cup button again at the desired output. Two beeps confirm that the new volume has been stored.
For manual control without overwriting a preset, press and hold 1 CUP or 2 CUP for low-pressure pre-infusion, release it to continue at full pressure and press the same button again when you want the shot to stop. This is useful while testing a beverage-weight target.
How to reset the programmed volumes
Hold PROGRAM until the machine beeps three times, then release it. On the current U.S. BES870, this restores both default shot volumes and the default espresso-water temperature. Record a custom temperature before resetting so that its disappearance is not mistaken for a new fault.
Adjust the BES870 water temperature last
The Barista Express can move its espresso-water setting 4°F above or below the default in 2°F increments. Temperature is a flavor adjustment; it should not be the first response to a shot that races through the basket or barely drips.
| Temperature setting | Button used in Advanced Temperature Mode | When it is reasonable to test |
|---|---|---|
| Default | PROGRAM | Start here for every new coffee |
| +2°F | 1 CUP | First warmer test after grind and dose are stable |
| +4°F | 2 CUP | Only if the smaller increase improved the cup but was insufficient |
| -2°F | FILTER SIZE | First cooler test after grind and dose are stable |
| -4°F | POWER | Only if the smaller decrease improved the cup but was insufficient |
How to enter Advanced Temperature Mode
- Switch the machine off with POWER.
- Press and hold PROGRAM, then press POWER. One beep confirms that temperature mode is active.
- Within five seconds, press the button for the desired setting in the table above.
- Listen for two beeps confirming the change. If no selection is made within five seconds, the machine returns to standby without changing the setting.
Keep the default for the first dial-in. Once shot speed and dose are correct, a light roast that remains sharply acidic can justify testing one warmer step; a dark roast that remains harsh or roasty can justify one cooler step. These are directions to test, not fixed roast prescriptions. Return to default if the change does not improve the taste.
Preheat the portafilter and cup before blaming the internal temperature setting. If coffee becomes unexpectedly cool despite proper warm-up, or water flow has weakened, settings alone may not explain it. Check the Barista Express cleaning and descaling guide and use the general troubleshooting path if maintenance does not restore normal operation.
Settings by shot result
Use this decision table only after confirming that the machine delivers normal water through the empty group head and that the basket is clean.
| Result in the cup | Check before changing anything | Best first adjustment | Avoid changing yet |
|---|---|---|---|
| Sour, thin and fast | Dose is within range and puck is level | Finer by one external setting | Temperature and programmed volume |
| Bitter, dry and very slow | Basket is not overfilled or blocked | Coarser by one external setting | Upper burr and temperature |
| Fast with a visibly low dose | FILTER SIZE matches the basket | Increase GRIND AMOUNT to restore the chosen dose | Tamp force |
| Slow with a visibly high dose | Razor removes a large excess | Decrease GRIND AMOUNT to restore the chosen dose | Shot-button programming |
| Good flow but too much espresso | Grind and dose are already repeatable | Stop manually at the chosen yield, then program it if desired | Grind size |
| Good flow but too little espresso | The preset was not changed accidentally | Use manual control or reprogram the button | Dose unless it is outside range |
| Good time but persistent sharpness | Cup and portafilter were preheated | Test +2°F or a slightly longer yield | Several variables together |
| Good time but persistent harshness | Coffee is fresh and basket is clean | Test -2°F or a slightly shorter yield | Several variables together |
Why yesterday’s setting may not work today
A grind number describes the gap in one grinder; it does not describe the coffee itself. Normal changes can make the same numbered setting behave differently:
- A different bag or roast: Bean density and roast development change how the coffee grinds and how quickly water passes through it.
- Bean age: Coffee changes after opening and can require gradual grind corrections over time.
- Weather and room conditions: Humidity and temperature can alter grinder behavior and puck resistance.
- A different basket: Moving between 1 CUP, 2 CUP, Single Wall and Dual Wall changes the puck and the correct dose.
- Grinder retention: Coffee from the prior setting can mix into the first dose after an adjustment.
- Residue or scale: A dirty basket, grinder chute or overdue descale can imitate a settings problem.
Record the bean, basket, dose, external grind setting, output and time rather than only the dial number. That small log lets you return close to a successful recipe without pretending the machine will never need another adjustment.
Common Barista Express settings mistakes
- Copying a stranger’s grind number exactly. Burr calibration, revision, coffee and age differ. Use another number only as a starting hypothesis.
- Changing grind, dose and temperature together. You cannot tell which correction helped or how to repeat it.
- Chasing the pressure gauge alone. Confirm dose, time, flow and taste; the needle is one piece of evidence.
- Programming the cup button too early. Establish a workable puck first, then store the stop point.
- Moving the upper burr before using the external range. The internal adjustment is for extending a range that is genuinely insufficient.
- Using temperature to fix a choked shot. Correct excessive resistance with grind, dose or basket cleaning.
- Comparing Single Wall and Dual Wall results directly. Their resistance is created differently, so their settings and gauge behavior are not interchangeable.
- Treating a fault as a recipe problem. Weak empty-group flow, no grinding, an abnormal noise or a cold machine requires diagnosis, not a more extreme setting.
For symptoms outside normal dial-in, use the complete Barista Express BES870 troubleshooting guide. If espresso is working but the milk side is not, the steam-wand troubleshooting guide keeps that separate from grinder settings.
Breville Barista Express settings FAQs
What is the best grind size for a Breville Barista Express?
The current U.S. BES870 manual recommends starting at grind size 5. The best final number is the one that produces a balanced extraction with your coffee, basket and dose. Move to a smaller number for a finer grind when the shot is too fast, or a larger number for a coarser grind when it is too slow.
How many grams should I use in the Barista Express?
Breville lists approximately 8–11 g for the supplied 1 CUP basket and 16–19 g for the 2 CUP basket in the current U.S. manual. Select a repeatable dose inside the relevant range and confirm the tamped puck is not overfilled.
Which direction makes the Breville grind finer?
A lower number on the external GRIND SIZE selector is finer; a higher number is coarser. Make one-number changes and retest with the same dose rather than moving several positions after one shot.
Should I use SINGLE or DOUBLE on the grinder?
Match FILTER SIZE to the basket installed in the portafilter: SINGLE for the 1 CUP basket and DOUBLE for the 2 CUP basket. This changes the automatic grind duration; it does not detect the basket for you.
What shot time should I target?
Breville’s extraction guide uses about 25–30 seconds as its balanced range, up to 20 seconds as under-extracted and more than 35 seconds as over-extracted. Use those bands with flow and taste rather than treating one second as a pass-or-fail line.
Should I adjust grind size or grind amount first?
First use GRIND AMOUNT to establish a repeatable dose within the basket’s range. Then hold that dose constant and use GRIND SIZE to correct extraction speed. Return to GRIND AMOUNT only when the timed grinder no longer delivers the chosen dose consistently.
What temperature should I use for light or dark roast?
Start at the factory temperature for either roast. After grind, dose and shot time are stable, test +2°F for a light roast that remains sharply acidic or -2°F for a dark roast that remains harsh. Keep the change only if the cup improves; roast label alone does not determine the setting.
How do I reset the Barista Express settings?
On the current U.S. BES870, hold PROGRAM until three beeps sound, then release it. This restores the factory 1 CUP and 2 CUP volumes and the default espresso-water temperature. It does not reset grind size, grind amount or the mechanical upper-burr position.
Why do I need a different grind setting for new beans?
Roast, density, age and room conditions change how coffee grinds and resists water. A number that worked for one bag is a useful reference, not a permanent machine calibration. Keep the dose and basket fixed, then correct the new coffee one grind step at a time.
Does this guide apply to the Barista Express Impress?
No. This guide is for the Barista Express BES870/BES870XL. The Barista Express Impress BES876 uses different dosing and tamping controls and should be set using its own manual.
A reliable Barista Express recipe begins with a matching basket and FILTER SIZE setting, a measured dose and a level tamp. Start at grind size 5 and the 3 o’clock GRIND AMOUNT position, then let the shot decide the direction: finer for fast flow, coarser for slow flow. Save a custom volume and test temperature only after the basic extraction is repeatable.