
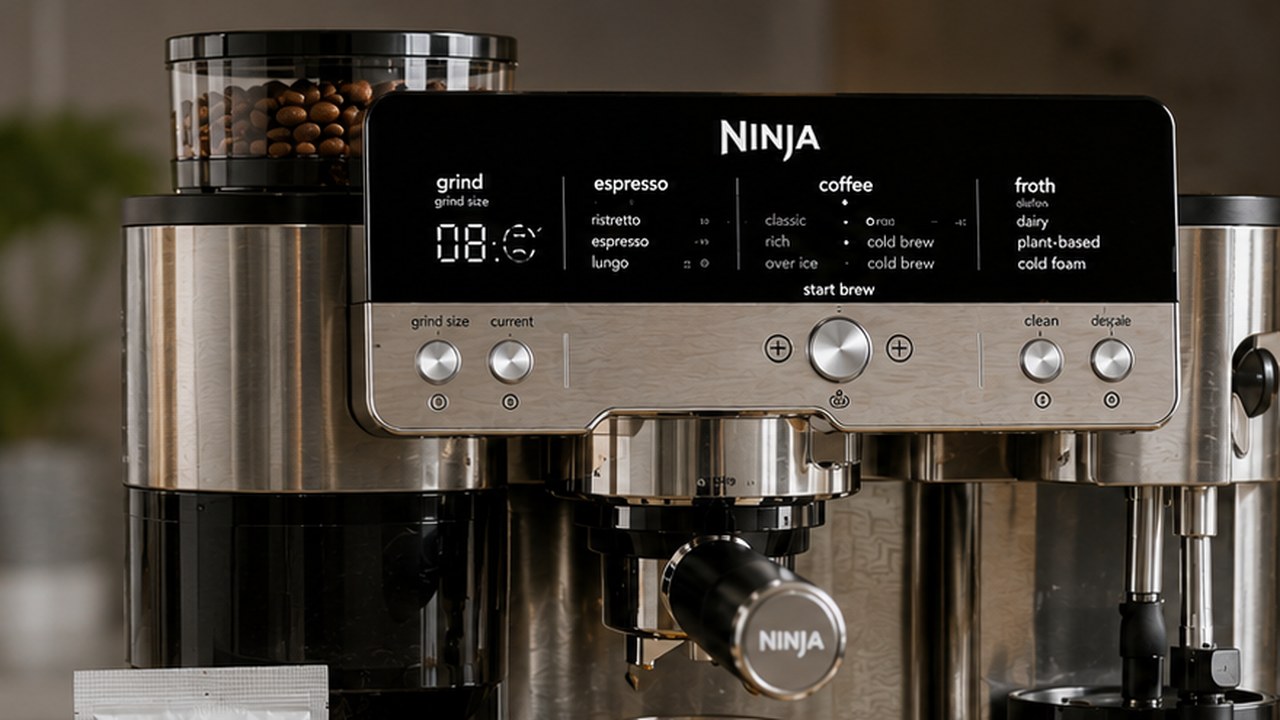
Cleaning the Ninja Luxe Café Premier ES601 involves more than pressing the CLEAN button. The machine has parts that should be rinsed after every use, areas that need weekly or monthly attention, and a separate automated CLEAN cycle that backflushes coffee oils and grounds from around the group head.
The important distinction is that cleaning and descaling are not the same maintenance job. The approximately 6-minute CLEAN cycle removes coffee residue and oils, while the much longer DESCALE cycle targets mineral buildup inside the water system. This guide focuses on cleaning and routine ES601 maintenance.
If your machine has broader brewing, water-flow or display problems rather than simply needing maintenance, start with our Ninja Luxe Café troubleshooting guide.
Ninja Luxe Café cleaning schedule at a glance
| When | What to clean |
|---|---|
| After each use | Portafilter, basket, steam wand and milk-contact parts |
| Weekly or bi-weekly | Main drip tray, center drip tray and group head rinse |
| Monthly or bi-monthly | Bean hopper, grinder, grinding chute, steam-wand tip and drip-tray indicator |
| When CLEAN light appears | Run the approximately 6-minute CLEAN cycle |
| When DESCALE light appears | Run the separate approximately 90-minute descale cycle |
| As needed | Water filter and group-head gasket inspection or replacement |
What the CLEAN button actually does
The ES601 CLEAN cycle is a programmed backflushing procedure for the brew system. Its purpose is to flush residual coffee oils and grounds that build up in and around the group head and shower screen.
During the cycle, the machine uses the cleaning disc to create the conditions needed to flush the group head. The resulting water and loosened residue are sent into the main drip tray.
The process takes approximately 6 minutes. That is very different from the roughly 90-minute DESCALE cycle.
CLEAN vs. DESCALE on the Ninja Luxe Café
| CLEAN | DESCALE | |
|---|---|---|
| Removes | Coffee oils and grounds | Limescale and mineral deposits |
| Main area | Group head and brew path | Internal water system |
| Approximate time | 6 minutes | 90 minutes |
| Product | Cleaning tablet | Descaling powder or approved vinegar method |
| Accessory | Cleaning disc | No cleaning disc required |
If the DESCALE light is illuminated, do not put a cleaning tablet into the machine and assume the shorter CLEAN cycle will remove scale. Likewise, descaling solution is not a replacement for the cleaning tablet when the CLEAN cycle is required.
For the separate mineral-removal procedure, use our Ninja Luxe Café descale guide.
What you need for the ES601 CLEAN cycle
- The Ninja Luxe Café cleaning disc.
- One espresso-machine cleaning tablet.
- The double basket.
- The portafilter.
- A water reservoir filled to the Max Fill line.
- An empty main drip tray.
The ES601 originally includes a cleaning disc and cleaning tablets. If you have used the supplied tablets, Ninja sells replacement Espresso Cleaning Tablets under model XSKCLNTBL8PK.
How to run the Ninja Luxe Café CLEAN cycle
- Empty the main drip tray completely. Water and residue from the CLEAN cycle are deposited into this tray.
- Fill the water reservoir. Add fresh water up to, but not above, the Max Fill line.
- Install the double basket. Put the double basket into the portafilter.
- Add the cleaning disc. Place it on top of the double basket with its handle facing upward.
- Add one cleaning tablet. Put a single tablet in the center of the cleaning disc.
- Lock in the portafilter. Install it normally in the group head.
- Press CLEAN. Then press the center dial to actually start the cleaning program.
- Allow the cycle to finish. The ES601 will backflush the shower screen and group head for approximately 6 minutes.
- Wait for the completion beep. Do not interrupt the cycle because water flow appears to pause or change.
- Remove the portafilter and drip tray carefully. Both may contain hot water when the cycle finishes.
- Hand-wash the removable parts. Use warm, soapy water and rinse thoroughly before reassembly.
Empty the drip tray before pressing CLEAN
This deserves emphasis because it is one of the easiest steps to overlook. The main drip tray is not simply sitting underneath the machine in case something drips during the CLEAN cycle. The ES601 intentionally sends cleaning water and sediment into it.
If the tray is already partly full when you begin, it may overflow onto the counter during the cycle even though nothing is mechanically wrong with the machine.
Remove it, empty it completely, reinstall it properly, and only then start CLEAN.
Which basket do you use for cleaning?
Use the double basket for the programmed CLEAN cycle.
Install the double basket in the portafilter first, then place the cleaning disc on top with its handle facing upward. The cleaning tablet sits in the center of that disc.
Do not simply drop a tablet into an empty portafilter or into the water reservoir. The tablet and cleaning disc are part of the specific backflush setup used by the ES601.
Where is the Ninja Luxe Café cleaning disc?
The ES601 includes a cleaning disc, and Ninja designed the machine with accessory storage so small maintenance parts can be kept with the machine rather than loose in a kitchen drawer.
If you have never run the CLEAN cycle before, check the machine’s accessory-storage area and the original accessories before assuming the disc was not supplied.
If the disc has been lost, replace it with the correct part rather than attempting to create your own solid insert. The clean cycle relies on the intended backflushing setup.
What if the CLEAN light is on?
The CLEAN light is the machine telling you that the programmed cleaning cycle is due. It is not simply a reminder to wipe the outside of the espresso machine.
Run the full CLEAN procedure with the double basket, cleaning disc and one tablet. Pressing the CLEAN button without completing the correct setup is not equivalent to carrying out the maintenance cycle.
You can also run a CLEAN cycle if brew quality changes and coffee-oil buildup around the group head is a reasonable suspect, even if you are not currently dealing with a DESCALE reminder.
What if the CLEAN light stays on after cleaning?
First confirm that you ran the programmed cycle rather than manually rinsing the group head.
- Make sure the double basket was installed.
- Make sure the cleaning disc was used.
- Use one cleaning tablet.
- Press CLEAN and then the center dial to start the actual cycle.
- Allow the approximately 6-minute program to reach completion.
- Wait for the machine to indicate that it has finished.
If the CLEAN light remains illuminated after a correctly completed cycle, turn the machine off normally and restart it. If the reminder still will not clear, do not run cleaning tablets through the machine repeatedly in quick succession just to make the light disappear.
What to clean after every use
The programmed CLEAN cycle is periodic maintenance. It does not replace the simple cleaning that should happen after normal brewing and frothing.
Rinse the portafilter and basket
Knock out the used puck after brewing and rinse coffee residue from the portafilter and basket. Pay attention to the basket holes and the rim where coffee can become trapped.
Dried coffee around the rim can interfere with a clean seal at the group head, while blocked basket holes can affect water flow during later shots.
Wipe the steam wand immediately
Milk residue becomes harder to remove once it dries. Wipe the outside of the steam wand with a cloth or paper towel dampened with warm water as soon as practical after frothing.
Allow the machine to complete the appropriate purge so milk is not left sitting around the steam outlet.
If the wand is already producing weak steam, poor foam or no heat, our Ninja Luxe Café frother troubleshooting guide covers the deeper diagnostic steps.
Rinse the milk jug and whisk
Do not leave a thin coating of milk on the jug or around the whisk until the next drink. Rinse milk-contact surfaces promptly so residue cannot harden around the moving parts of the frothing system.
Weekly or bi-weekly Ninja Luxe Café cleaning
The next level of maintenance focuses on areas that collect water, grounds and splashes during normal use.
Clean the main drip tray
Remove the main drip tray and empty it before it becomes completely full. Rinse or wipe all accessible parts to remove coffee grounds and residue.
Do not assume every tray containing water indicates a leak. The ES601 intentionally sends water to the drip tray during normal operation and maintenance procedures.
Wipe the center drip tray
The smaller center area also collects splashes and coffee residue. Remove loose grounds before they become wet and form a compacted layer.
Rinse the group head and shower screen
Coffee grounds can accumulate around the shower screen even between automated CLEAN cycles. A water-only brew through the group head helps flush loose coffee away before it becomes heavily baked onto the surface.
This rinse is routine maintenance. It is not a substitute for the cleaning-tablet cycle when the CLEAN light is on.
Monthly or bi-monthly cleaning
Parts associated with the grinder and steam system can accumulate residue more gradually, so they deserve periodic deeper attention even when the machine still appears to be working normally.
Clean the bean hopper
Coffee oils and fine particles accumulate on the hopper over time, particularly with darker beans. Empty the hopper before cleaning it and make sure it is completely dry before reinstalling and adding beans.
Moisture has no place around coffee entering the burr grinder.
Brush the conical burr grinder
Turn the machine off and unplug it before accessing the burr area. Remove the hopper and removable upper burr as intended, then use the supplied grinder brush to remove retained coffee from the burrs and accessible grinding path.
Do not wash the burrs with water. They should remain dry.
If the grinder is already jamming, showing ADD BEANS with a full hopper, failing to dispense grounds or dosing incorrectly, see our Ninja Luxe Café grinder troubleshooting guide rather than treating it as routine cleaning alone.
Clean the grinding chute and cradle
Ground coffee does not remain only around the visible burr. Fine particles can collect farther down the path toward the portafilter and around the grinding cradle.
Use the cleaning brush on accessible areas and remove loose or compacted coffee without pushing improvised tools deeply into the machine.
Deep-clean the steam-wand tip
If wiping and purging are not enough, the ES601 cleaning tool includes the means to remove and clear the steam-wand tip. The cleaning needle can be used to remove material from the small openings.
Allow the wand to cool first, and do not enlarge the steam opening with a drill bit or oversized needle.
Can the removable parts go in the dishwasher?
When the manufacturer specifically tells you to hand-wash a component after the CLEAN cycle, use warm, soapy water and hand-wash it rather than assuming every removable espresso-machine part is dishwasher-safe.
The safest general approach is to follow the cleaning method specified for each part. Components associated with the grinder must receive particular care because the burrs should remain dry.
Never immerse the machine base, power cord or other electrical sections in water.
Can you clean the Ninja Luxe Café with vinegar?
Do not use vinegar as a replacement for the cleaning tablet in the 6-minute CLEAN cycle.
White vinegar appears in the ES601’s documented descaling procedure as an alternative way to remove mineral buildup. That is a different process from removing coffee oils with the CLEAN cycle.
If you need the vinegar quantities and full procedure, follow the dedicated ES601 descaling instructions rather than pouring vinegar into a normal cleaning cycle.
Can you use any espresso cleaning tablet?
The straightforward choice is the Ninja cleaning tablet intended for the Luxe Café system because its use is documented with the cleaning disc and programmed cycle.
Third-party espresso cleaning products exist, but tablet size, chemistry and dosing can differ. If you choose an alternative product, verify that it is specifically intended for espresso-machine backflushing and that its manufacturer provides instructions appropriate for this use.
Do not substitute descaling tablets, denture tablets, dishwasher detergent or general household cleaning products.
How often should you run the CLEAN cycle?
The simplest rule is to run the programmed cycle when the CLEAN light illuminates. The ES601 is designed to tell you when that maintenance cycle is required.
You may also run it when you notice a meaningful deterioration in brew quality and coffee-oil buildup around the group head is a plausible cause.
That does not mean more cleaning tablets are always better. There is no reason to run several backflush cycles consecutively on a machine that has just completed one correctly and is otherwise functioning normally.
Why coffee can taste bad even when the machine looks clean
Visible cleanliness and internal brew-path cleanliness are different things. The stainless-steel exterior can look spotless while coffee oils are accumulating around the group head.
Old coffee residue can contribute stale or bitter flavors, while a dirty basket can affect extraction. Milk residue creates its own problems in the frothing system.
If taste has changed, consider what type of maintenance is overdue before altering every brewing setting. CLEAN addresses coffee residue; DESCALE addresses minerals; grinder maintenance addresses retained grounds and oils around the burrs.
What if water overflows during the CLEAN cycle?
The first thing to check is the main drip tray. Because cleaning-cycle water is intentionally deposited there, starting with a tray that already contains a substantial amount of water can make it overflow.
Stop and clean up any spilled water safely, particularly if it approaches the power cord or electrical parts. Before the next maintenance cycle, make sure the tray is completely empty and correctly installed.
If water is leaking from somewhere other than the expected tray or group-head path, treat that as a leak rather than normal CLEAN-cycle drainage.
What if the CLEAN cycle will not start?
If pressing CLEAN does not start the cycle, verify the preparation before assuming the machine has failed.
- Fill the reservoir with fresh water.
- Empty and reinstall the main drip tray.
- Install the double basket.
- Place the cleaning disc correctly with the handle facing upward.
- Place one cleaning tablet in the center of the disc.
- Lock the portafilter fully into the group head.
- Press CLEAN and then press the center dial to start.
Also look for another message on the control panel that may indicate a water or installation issue.
If the machine cannot run other water-based operations either, the problem may be broader than the cleaning procedure itself.
Do you need to rinse after the CLEAN cycle?
Once the programmed cycle finishes, remove the portafilter and drip tray carefully and hand-wash the affected removable parts with warm, soapy water.
Rinse away soap and cleaning residue thoroughly before brewing again. You should not be leaving cleaning-tablet residue sitting in the basket, disc, portafilter or tray.
If you detect an unusual cleaning-product taste or odor afterward, run fresh water through the brew path before making your next drink.
Clean the machine exterior without damaging it
The outside of the ES601 does not need aggressive cleaner. Wipe the machine with a soft damp cloth and then dry it.
- Do not pour water over the control panel.
- Do not spray cleaner directly into openings.
- Do not use abrasive pads on finished surfaces.
- Do not allow water to run into the grinder.
- Keep the electrical base and cord dry.
For stubborn splashes, apply a small amount of appropriate cleaner to the cloth rather than spraying the machine directly.
A practical ES601 maintenance routine
You do not need to dismantle the Ninja Luxe Café after every drink. A consistent routine is more useful than occasional aggressive cleaning.
- After brewing: remove the puck and rinse the portafilter and basket.
- After frothing: wipe and purge the steam wand and rinse the milk jug.
- Every week or two: clean the drip trays and rinse the group head.
- Periodically: brush the grinder, clean the hopper and clear the steam-wand tip.
- When CLEAN illuminates: run the 6-minute tablet-and-disc cleaning cycle.
- When DESCALE illuminates: run the separate descaling procedure.
Ninja Luxe Café cleaning checklist
Before considering the ES601 fully cleaned, check the areas that correspond to the maintenance you are doing:
- Portafilter rinsed and free of old coffee.
- Basket holes clear.
- Steam wand wiped and purged.
- Milk jug and whisk free of dried milk.
- Main drip tray emptied and rinsed.
- Center drip area wiped clean.
- Loose grounds removed from the group head.
- Bean hopper and grinder cleaned periodically and fully dry.
- CLEAN cycle completed when requested.
- DESCALE treated as a separate maintenance procedure.
Keep routine cleaning separate from troubleshooting
A dirty ES601 can cause stale flavors, restricted coffee flow, poor frothing and grinder buildup, so cleaning is always worth checking when performance has gradually deteriorated. But maintenance should not become a universal explanation for every fault.
If the grinder repeatedly jams after it has been properly brushed, the steam system still will not work after its tip is clear, or the machine cannot move water despite normal maintenance, follow the troubleshooting path for that specific symptom rather than repeatedly running CLEAN cycles.
For normal maintenance, the simplest approach is the best one: clean milk and coffee residue before it hardens, keep the grinder dry, empty the drip tray regularly, and let the ES601’s CLEAN and DESCALE indicators tell you when the two programmed maintenance cycles are due.